Wednesday, September 4, 2013
Thursday, August 1, 2013
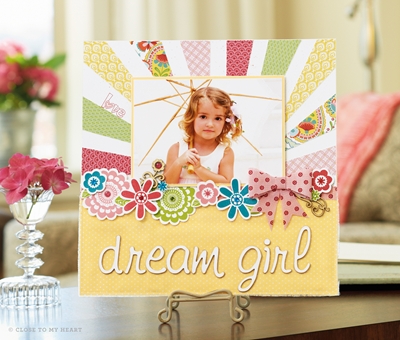
Autumn/Winter 2013 CTMH Catalog
The new catalog is here and it's a go! Sit down and take some time to browse the pages and explore the new and fresh product that Close To My Heart has brought out for our crafting pleasure.
Scrapbooking, card making, gifts and now even jewlery you can make yourself.


jlynnscreativeitch.ctmh.com
Scrapbooking, card making, gifts and now even jewlery you can make yourself.


jlynnscreativeitch.ctmh.com
Wednesday, May 1, 2013
Friday, April 19, 2013
The little space

Monday, April 8, 2013
Creating with Canvas
If you wanted a bit of help making these wonderful decorations!
http://youtu.be/Prm9WPVkDvg
http://youtu.be/Prm9WPVkDvg
Wednesday, March 27, 2013
Crafting the Winter Blues away.
I know Spring is struggling to get here. Honestly I have been okay with that. It has given me time to complete a list of projects/crafts that I had wanted to do, before the beautiful weather played a siren song to lure me outdoors. And besides a card I have been working on I have done pretty well completing said list.

I did wrap the wreath ( the cheapest I could find, a straw one) with inexpensive green yarn before I wrapped the yummy yarn around it. It saved on cost, I didn't even use the whole skein of fuzzy yarn, so I have some for other projects, yay.

My next project was a bigger one. It was redecorating my craft space. If any of you have been here before you know that it was a Twilight corner. That being over and done with, at least for me, I was ready for something fresh. So down it all came, sniffle sniffle.
I have always loved the pink and orange combo, at least since High School when I really wanted to make a prom dress with the combo, but didn't. And the colors seem to fit the trends right now so that is where I went, with a pop of blue. I had to work with the green walls because I was not up for the undertaking of repainting an entire room. I am 7 months pregnant people.


I am missing two pictures, thus the empty corners, because I used two canvas' on messups. And have to purchase two more and finish the collage.
I used the 6x6 canvases from Close To My Heart as well as their Claire paper packet.


I also (which I forgot to take photos of) recovered two old pillows with some fun fabric I found with pink and orange in the pattern. I also used the same fabric, to basically make a "pillowcase" in which I used to cover one of the vinyl chairs in the room. It just added a bit more color to the room.

These two projects are done by two wonderful women. My sister Jaime made this adorable owl mobile for my baby's room. Her new favorite medium is felt, is has made some really adorable thing from this unsuspecting material. LOVE it.

My sister-in-law Arielle sewed this owl, again for the upcoming baby's room. He is so fun! She incorporated some material that was handed down from a grandmother (or great). It is the orange patterned material on the bottom and wings. So crazy fun.
You can see how spoiled I am, cute stuff and I didn't have to make it ;)


Well thanks for indulging me on my craft download. Don't expect much for a few months. Baby is due in May and I don't see myself in the craft corner much, outside in the garden if children permit. So have a great spring! If you have any questions please post them or comment on my facebook page and I will get back to you!
Keep at that creative itch!
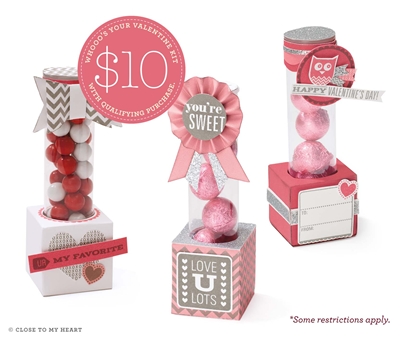
Thursday, February 14, 2013
Wednesday, February 6, 2013
Heart garland

You have seen them posted all over, at least I have. This year I actually got around to putting one together. Easier said than done. Here is my list of do's and don'ts for making a stringed garland.
Don't- use cheap paper, unless you are willing to work with the deficiencies. I bought the pack of Valentine paper from Target in the $1 section. Didn't plan on using the same garland next year cuz I figured it would get too easily tangled in storage The down side of this was that the paper is one sided and very lite.
Do- use double sided paper, unless you like the white side in your arrangement.
Do- use a real sewing machine. I tried to cut a big corner and use my tiny craft sewing machine and it was more trouble that it was worth. The stitching is way obvious and easily comes unraveled.
Don't- sew through the middle. Unless you were smart and used two sided paper. Since the top of my hearts were heavier they tended to go to the bottom making it the upside down and back of each heart. I remedied this by applying a dab of glue to the back/bottom of the conflicted hearts to weigh the bottoms down. Being cheeper thin paper they then puckered from this but from a distance you can't tell.
So Do- sew across the top.
The one thing I do like about the lighter paper is that they flutter so much prettier when hung.
Storage- if you love it and want to keep it for years to come I am sure you could, with patience, fold them accordion style and paper clip them together to prevent tangling. )
Sunday, February 3, 2013
Happy Valentines Day!

Happy Valentines Day!
Friday, February 1, 2013
New Spring/ Summer CTMH Products

Friday, January 25, 2013
Paper Owls
 I pinned it and finally did it. My Pinterest board said I pinned it 11 months ago. I had bought the paper and the canvas and was just waiting till the motivation hit I guess.
The original owl was taken from Close To My Heart but my pin leads to nowhere so I can't link you to where I found it, it may have been on our Consultant page.
Anyways here they are and please excuse the photographs. The weather is really gloomy so lighting was nil. Then I made the owls a bit glossy making using the flash a frustration. Somethings look better in person, lol.
Size may be deceiving. The base under the owls is a 12X12 card stock. The original project that I was basing mine on was just the 12x12 size canvas, but I had trouble finding inexpensive 12x12 canvas so I purchased bigger and added the embellishments to the sides.
The pieced owl was done free hand so don't go searching for the template like I did at first. You can do it! The embellishments or "yo yo's" were made using the Artiste cartridge from Close To My Heart. Paper used was Elemental which is discontinued, I had bought it early last year for this project. I dry embossed the 12x12 backing by scoring lines then sanding the raised area. The beak and wings were adhered using foam tape to give them height.


I added some stamp distressing to the canvas. Wanted something other than just a white background.

These little cuties are going on my baby's room walls in a month or so. Yay!
Tuesday, January 15, 2013
Memories shared
I have said this a few times, whether in type or by word of mouth but it seems that any time I get to craft is when I am asked to help do something for someone else. I love this. Twist my arm and make me be creative. Whether its handouts for a class or helping a neighbor create her Christmas gifts it gives me the excuse. Last week my sweet Grandmother passed away, quite quickly actually. My mother asked me, "since I do that sort of thing", lol, to collect pictures of our family with grandma and put them on a poster board. Well I had thousands of pictures to sift through and only 2 days to get it together but I did create something somewhat presentable I think. I was grateful that I had ordered the Clementine paper kit on a whim and had it on hand, it worked perfectly.
Hope this gives you some creative inspiration next time you are under the clock ;)
 My Grandmother loved clocks, she had more than we could count all over her house. She also loved birds. So I incorporated those memories in as well. I loved having all of the supplies on hand for such project. It made me happy.
Hope this gives you some creative inspiration next time you are under the clock ;)

Thursday, January 3, 2013
And the new year begins!
I still have tons of scrapbooking to do but also have a baby on the way and hope to add a few touches to his room before he comes. Good luck to me.
I hope you find some time and some creative inspiration during these cold winter months!
Subscribe to:
Posts (Atom)